UpStream Time Tracking and Budgeting provides a comprehensive solution for recording hours and budgets spent on projects, tasks, and bugs.
Once you install and activate Time Tracking, you will get a new box in each task and bug that allows you to enter time.
The Time Tracking Interface
When you create or edit a task, you will see a box like this on the front end:
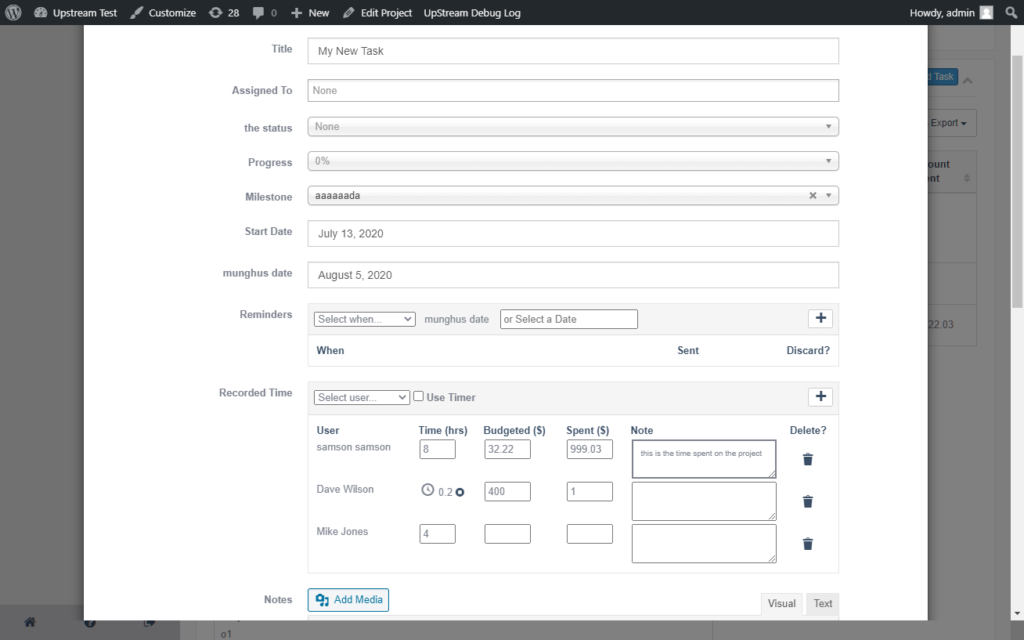
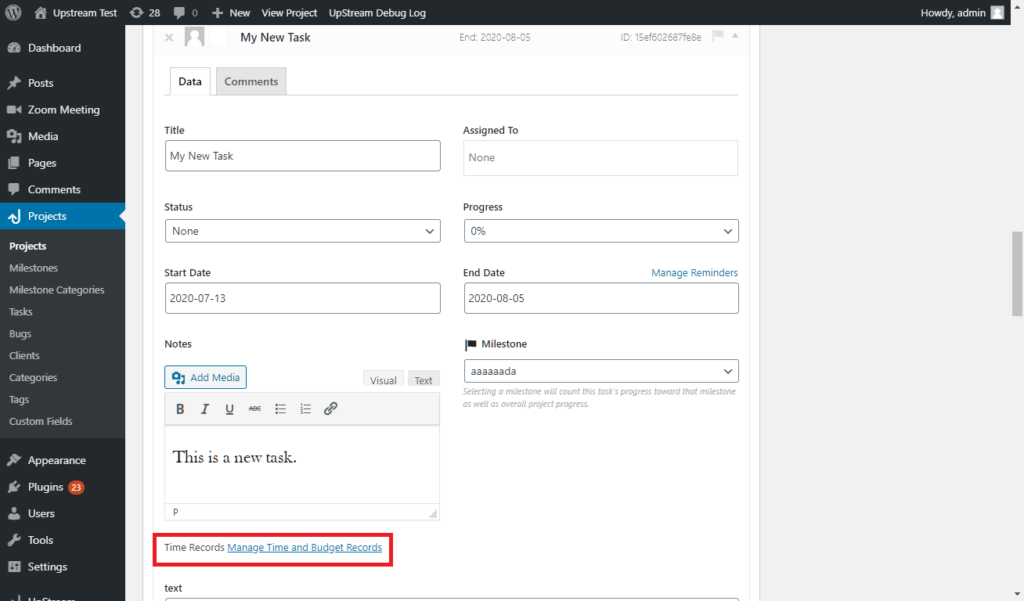
In the WordPress admin interface, you will have to click on the Manage Time and Budget Records link under a task:
Once you click Manage Time and Budget Records, you see a popup that looks like this:
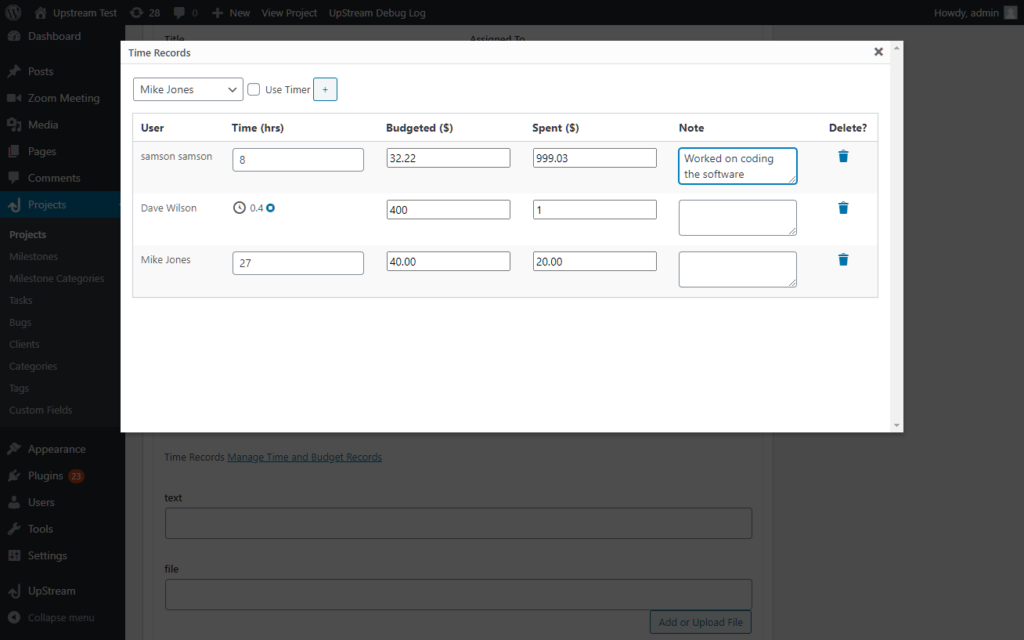
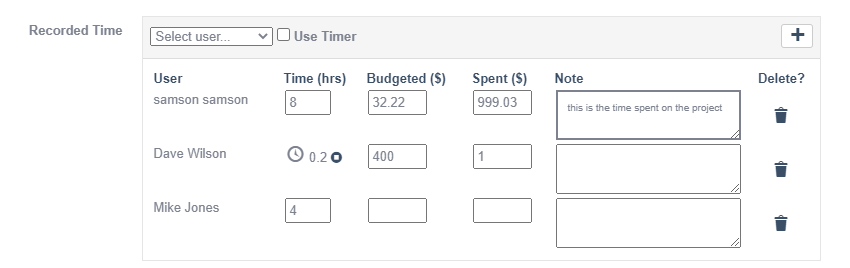
To create a new record, select the user for whom you want to create the record. Then, if you want to manually enter the time, just click the plus sign (see below, in the red box).
If you want to use a timer, check of the Use Timer box and then click the plus sign. That will start a timer, which will count the number of hours since it was started.
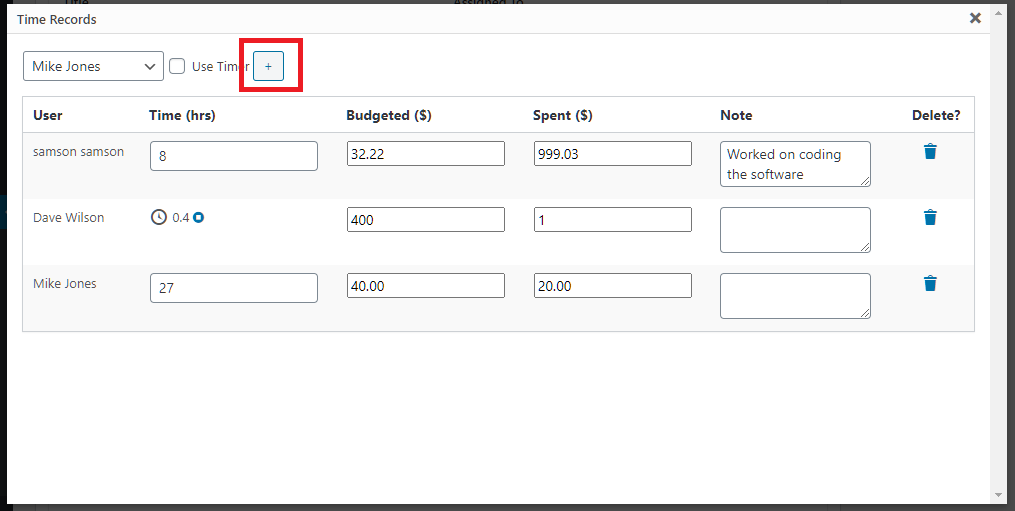
You can then enter the budgeted amount and the amount spent, as well as a note in the Notes section.
If you are using a timer, you can stop timing by clicking the small stop button next to the time record (see below, in the red box).

You can also delete any record by clicking on the Delete icon next to the record.
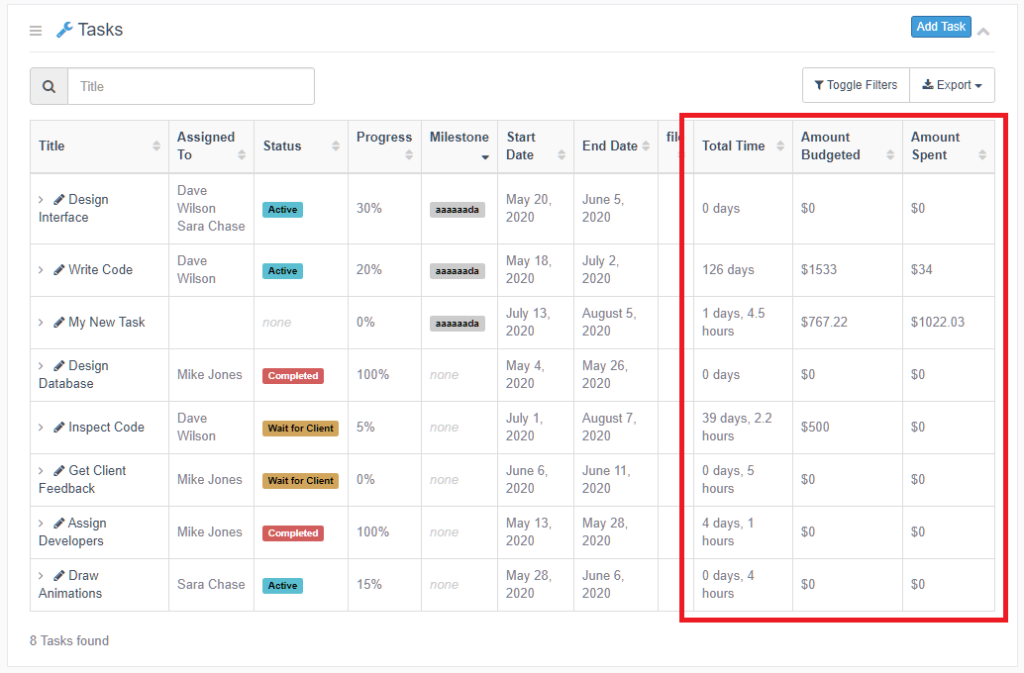
The total time, amount budgeted, and amount spent so far incurred in performing the task (or bug) shows up in the list of tasks (or bugs) on the front end, as you can see below:
Time also rolls up to the project level, as you can see here:
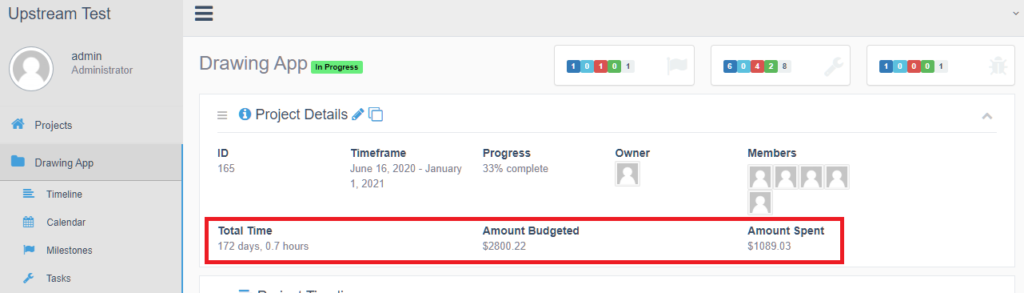
Setting Day Length
To make numbers easier to read, in some cases, UpStream displays time as days and hours (like above).
Days defined as working days. By default they are set to 8 hours long. So 3 days would be 24 hours (not 72 hours).
You can change the number of working hours per day by going to the WordPress administrative dashboard, and selecting UpStream -> General, and setting the number under Work Hours Per Day:
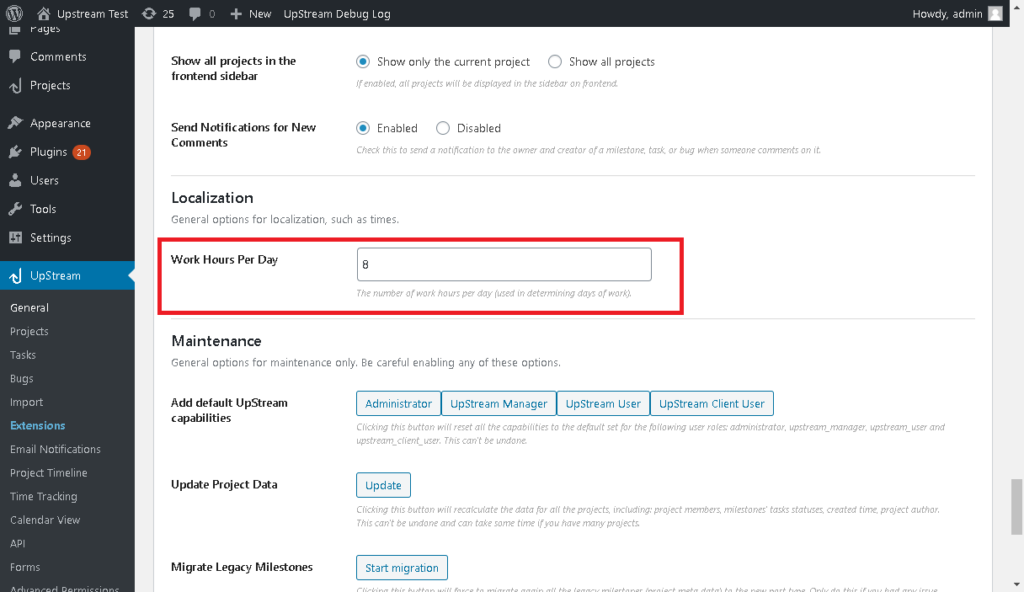
Note that when using a timer, every hour is recorded, so if you start the timer on Monday at 9:00 AM and end the timer on Tuesday at 9:00 AM, the timer will record 24 hours.
Setting the Currency Symbol
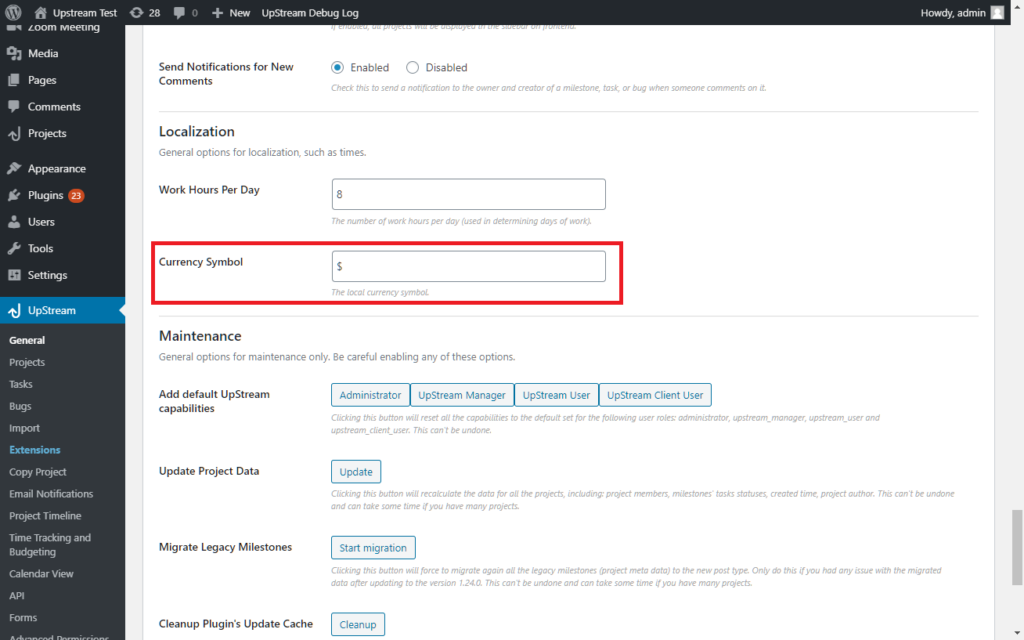
Before you begin, you will want to set the currency symbol to your local currency. By default, it is the dollar sign ($); however, you can use anything you want.
To set it, go to the WordPress administrative dashboard, and select UpStream -> General, and enter the symbol under Currency Symbol:
Reporting
If you have the UpStream Reporting module, you can run many different types of reports on tracked time.
For any report, you can filter on time spent. For instance, you can view a report of all projects where the time spent is less than 20 hours by going to the Project Table report, and entering 20 as the maximum:
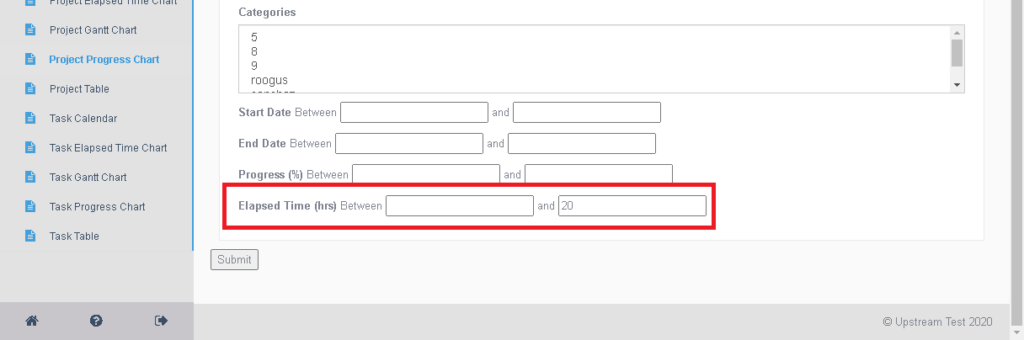
If you want to find all milestones with elapsed time between 50 and 100 hours, you can enter those numbers in the boxes instead.
Note that you must enter a number of hours in the boxes — not days.
Elapsed Time Chart
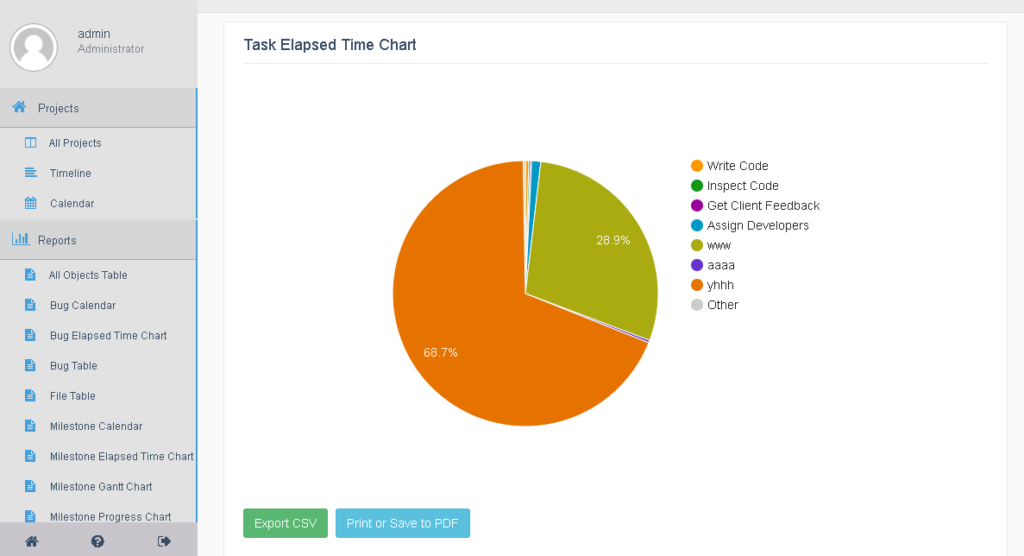
In the Reporting module, there are elapsed time reports for projects, tasks, milestones, and bugs.
After choosing filters, you will see a pie chart of objects (projects/tasks/etc), with the percentage of hours spent, like this:
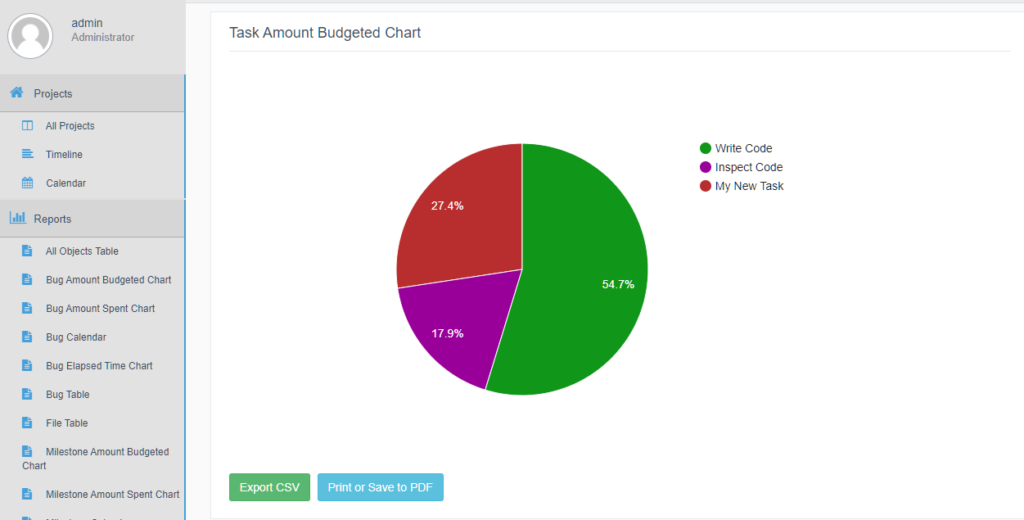
Amount Budgeted/Amount Spent Chart
To see amounts budgeted or spent, you can run the Amount Budgeted or Amount Spent report. These reports are available for projects, milestones, bugs, and tasks.
After choosing filters, you will see a pie chart of the percentage of the total spent on each task/project/milestone/bug. You can mouse over each item to see the amount spent.