UpStream offers two options for file uploads. You can use the built in WordPress file manager, or the UpStream secure file upload option.
To understand the difference between the two options, click here.
In this article, we will explain how to use UpStream Secure File Uploads. This will require some configuration by your system administrator in order to ensure files are uploadable.
Before You Begin
There are a few notes before beginning with UpStream secure file uploads.
The first one is the most important: DO NOT CHANGE YOUR FILE UPLOAD OPTION AFTER YOU HAVE ADDED FILES TO UPSTREAM.
Because WordPress’s file manager is incompatible with UpStream’s secure file manager, you cannot switch between them. If you do, your files will be lost. So make sure to decide which solution you want to use before adding files.
Also, because UpStream uses WordPress’s standard comment function, comments still use WordPress’ file manager if you upload files. We suggest never uploading files in comments anyway, and just using the File section in UpStream.
Preparing Your Server
You must prepare your server before setting up UpStream secure file uploads.
To do that, you will need to create a server-writeable directory that is not under the public WWW directory. For instance, if your WordPress installation is in /var/www/, you would need to create a server-writeable path outside of that directory.
The specific way this is done depends on your operating system and your web server. Contact your system administrator to find out how you can do this on your site.
Once you have created the directory, you must make sure that directory is writeable by the web server. This again depends on the operating system and web server you are using.
Turning On UpStream Secure Files
Once you are sure that you have a web server-writeable directory on your server, you can turn on UpStream secure file manager.
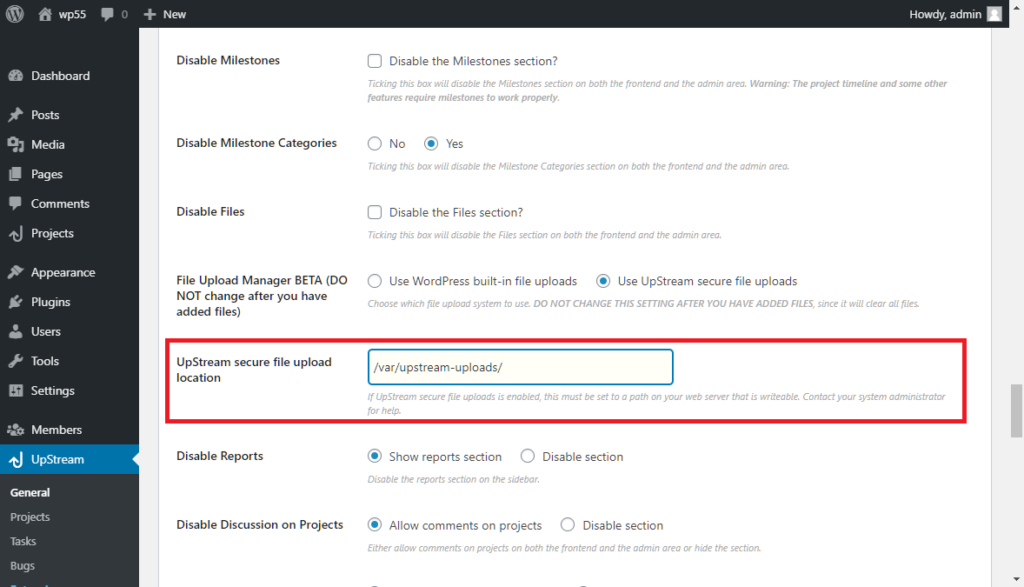
To do this, go to your WordPress admin area, and click UpStream -> General. Then scroll down and enter the complete path to the server writeable directory in the “UpStream secure file upload location” field:
Then, you can enable UpStream secure file uploads. Before you do, one more warning:
DO NOT CHANGE YOUR FILE UPLOAD OPTION AFTER YOU HAVE ADDED FILES TO UPSTREAM.
If you are ready to turn on UpStream secure file uploads, you can now click on “UpStream secure file uploads” under “File Upload Manager”:

Using UpStream Secure File Uploads
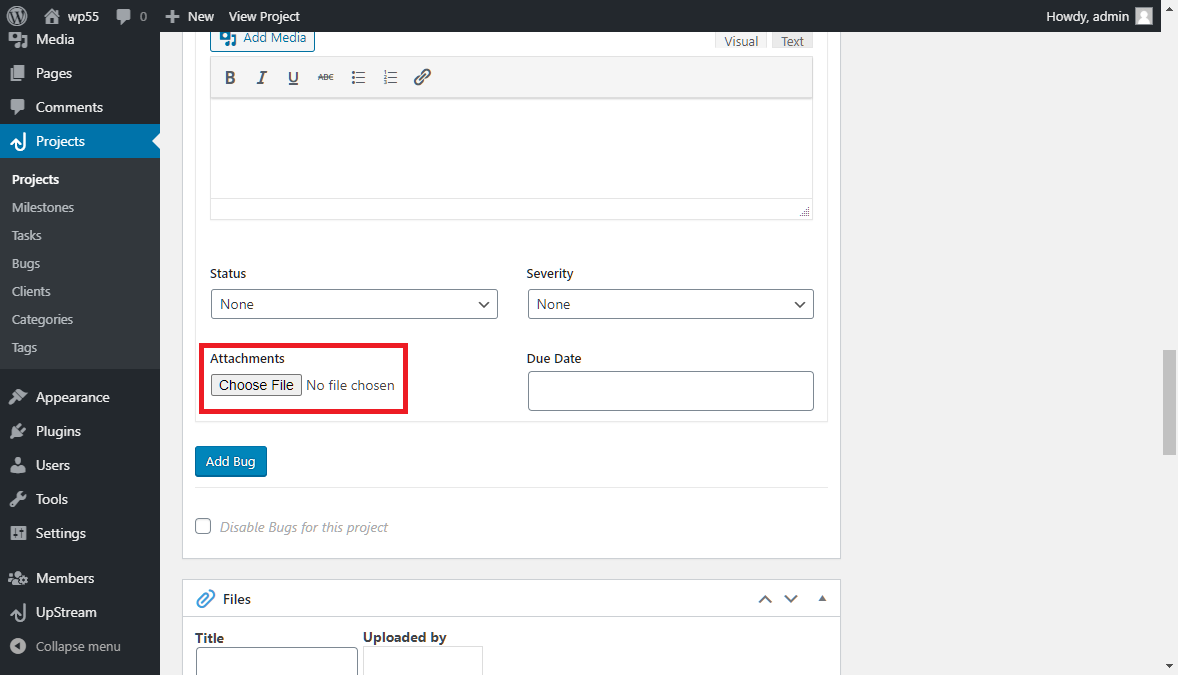
Once you have turned on UpStream secure file uploads, you will see that the upload buttons look different:
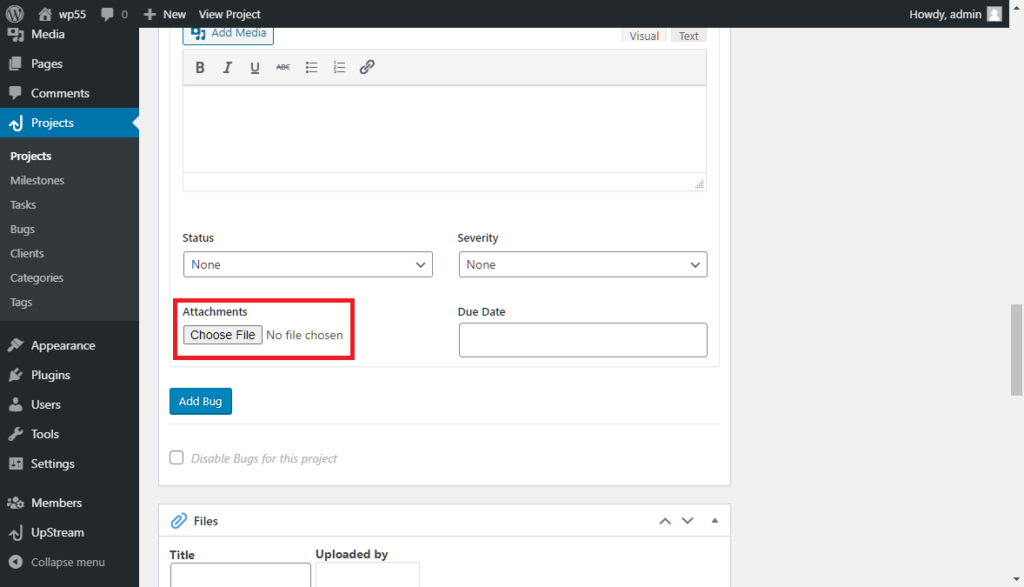
Whereas, with UpStream secure file uploads OFF, you would see the standard WordPress file upload button.
On the front end, when you turn on UpStream secure file uploads, your upload button will look like this:
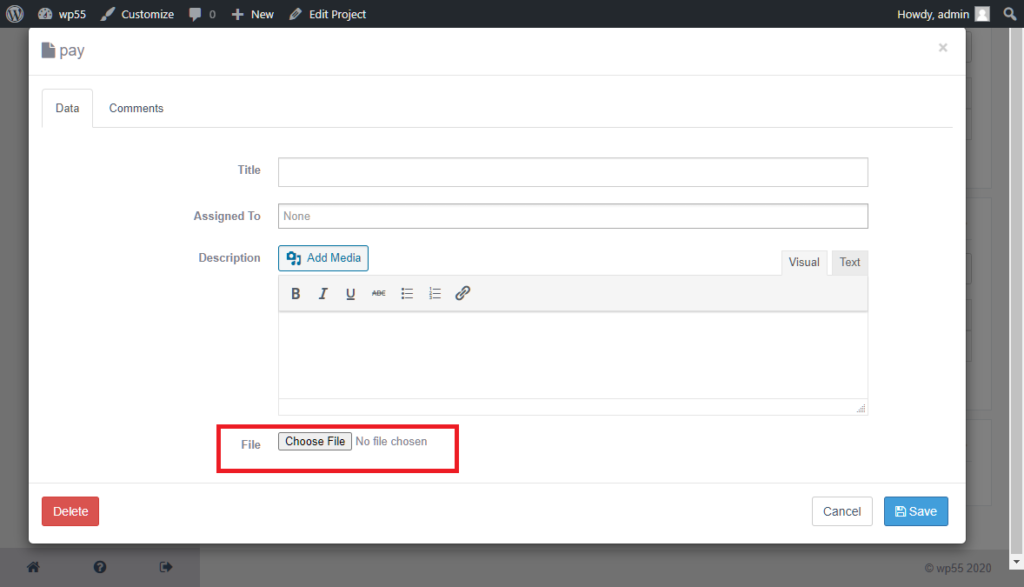
Note that file upload behavior is a bit different when UpStream File Uploads is on. Files are not uploaded until you click the Save button on the front end, or the Publish or Update button on the back end.