UpStream addons need to be updated periodically in order to insure the latest features and bug fixes. Generally, this is an easy process, but sometimes there are problems. This guide will explain how to update your addons in either case.
Automatically Updating
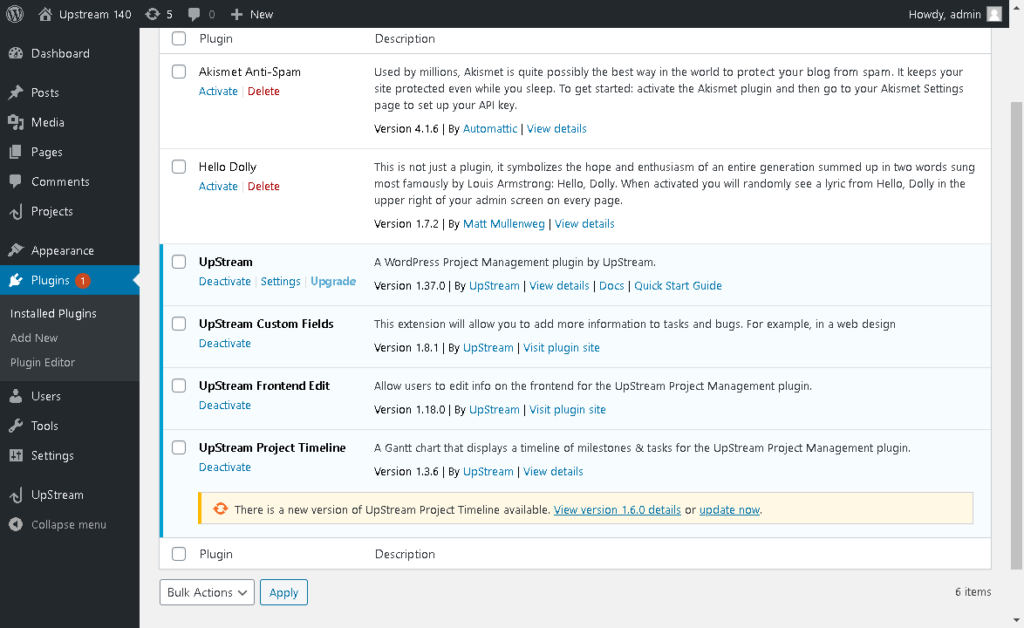
In most cases, you will automatically be notified that your UpStream addon is out of date, in the same way other plugins work: you will see a message on your WordPress plugins page, like below.

You can then click the update now button, and the addon should automatically be updated.
Troubleshooting An Update Error
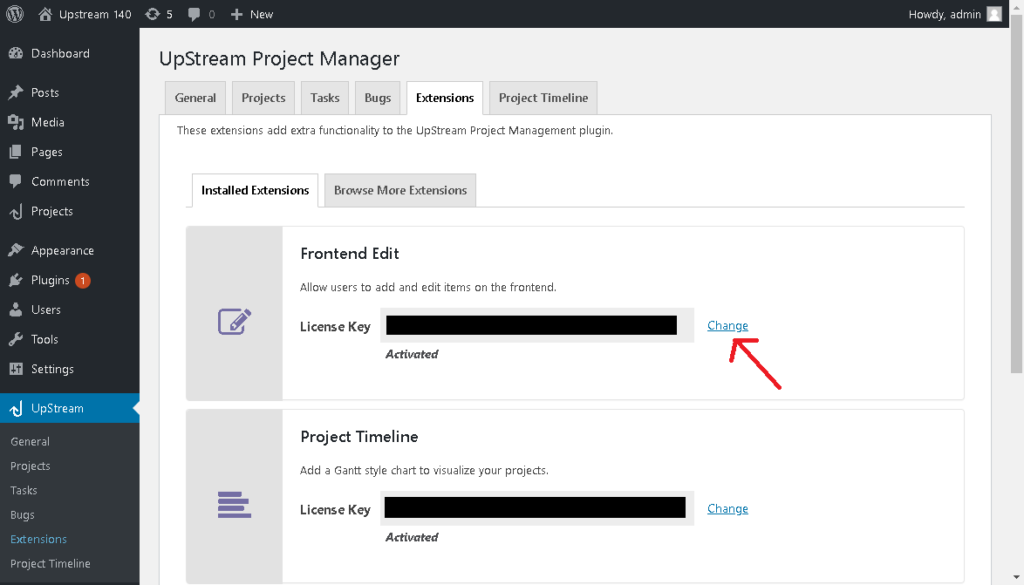
It you try to click update now, and you get an error message, your license key may have become corrupted. To fix this, go to your WordPress admin dashboard and click UpStream -> Extensions.
You will see a list of your installed addons, with the license keys entered. Copy your license number down, and then click the change link.

Then, re-enter your license key and click activate. You should then be able to return to the plugins page and update your addons.
If you have trouble, please let us know and we’d be happy to help.
Don’t See An Update Message? Manually Update
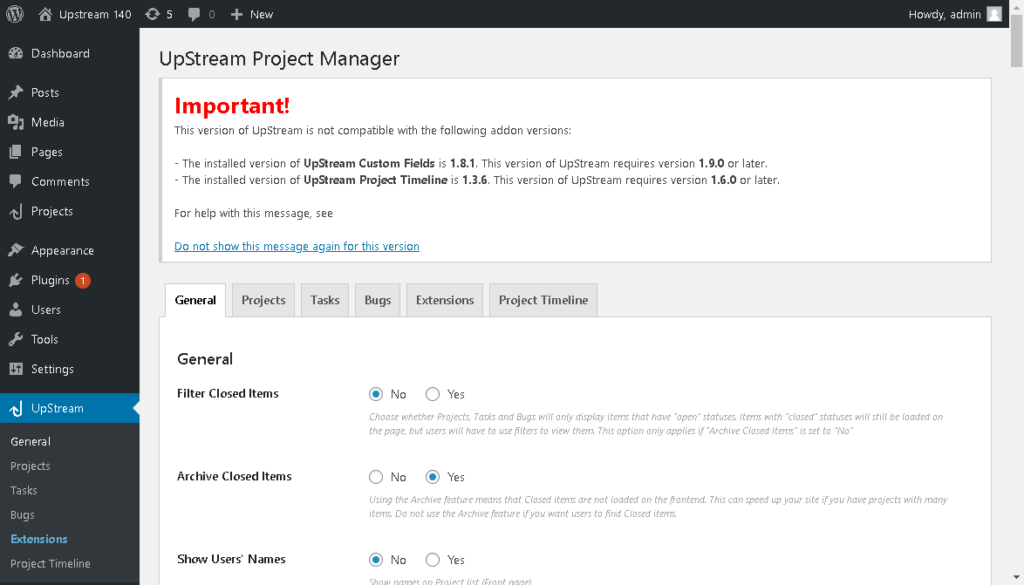
In rare cases, you may not see an update message on the plugins page. Instead, upon updating the main UpStream plugin, you may see a message like this:

When you see that message, you should first go to your plugins page and see if you can update your UpStream addons using the method above.
However, if that doesn’t work, you will have to manually update the addon(s). To do that, use the following steps:
1. Click here and log in to your UpStream account. If you need help logging in, contact us.
2. Once you have logged in, click here to view your downloads. Download the addons that you need to update. These will be the latest versions.
3. Return to your WordPress site, and go to your plugins page. Then deactivate and delete the addons that you want to update. When deleting UpStream addons, you will not lose any data.
NOTE: DO NOT DEACTIVATE OR DELETE THE MAIN UPSTREAM PLUGIN. THAT MAY CAUSE DATA LOSS.
4. Click on the Add New button at the top of the plugins page. This will take you to the add plugins page.
5. On the add plugins page, click Upload Plugin. Upload the ZIP files you downloaded in step 2.
6. Click Install Now to install the addon, and then Activate to activate it.
7. Repeat steps 4-6 for all of the addons you need to update.
If you need any help updating your addons, please contact us!
